
Your cart is currently empty!
3 Cost Effective WAYS to improve your home appearance and feel right away!
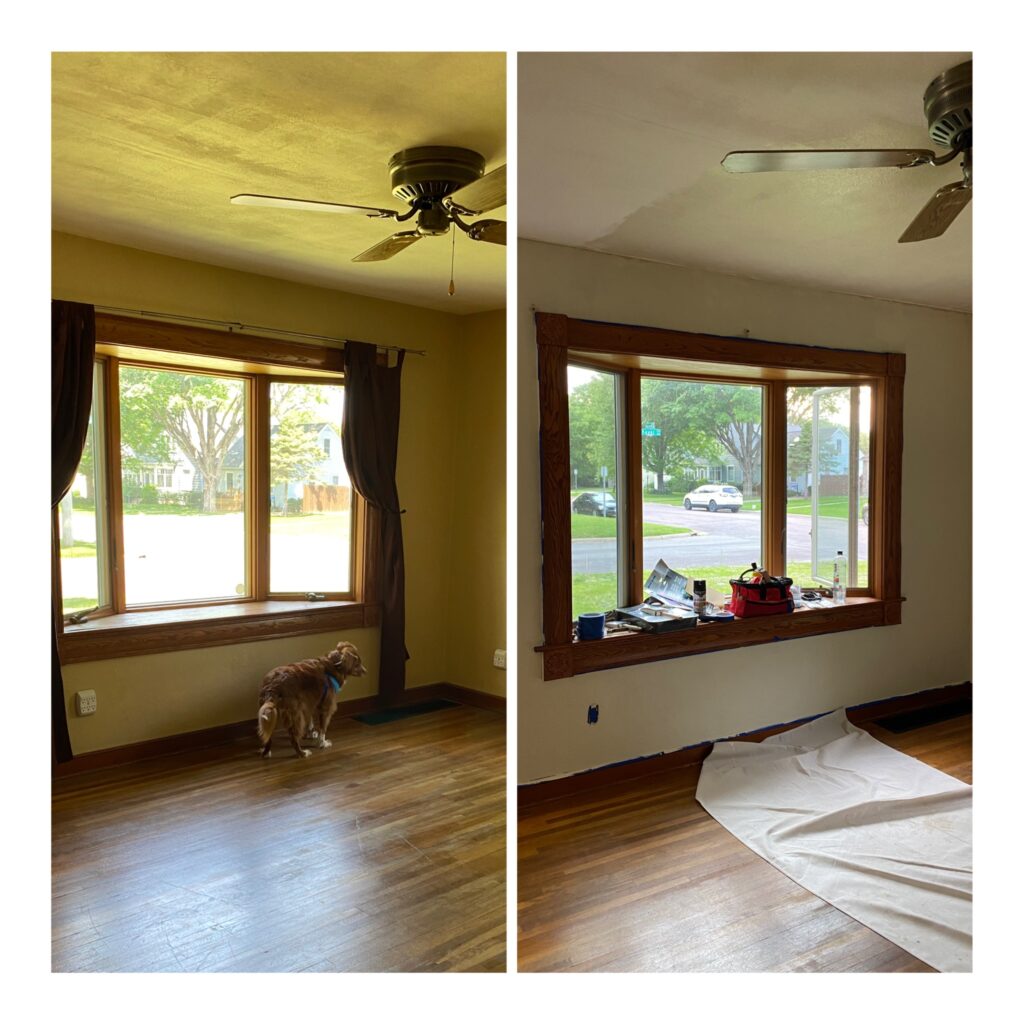
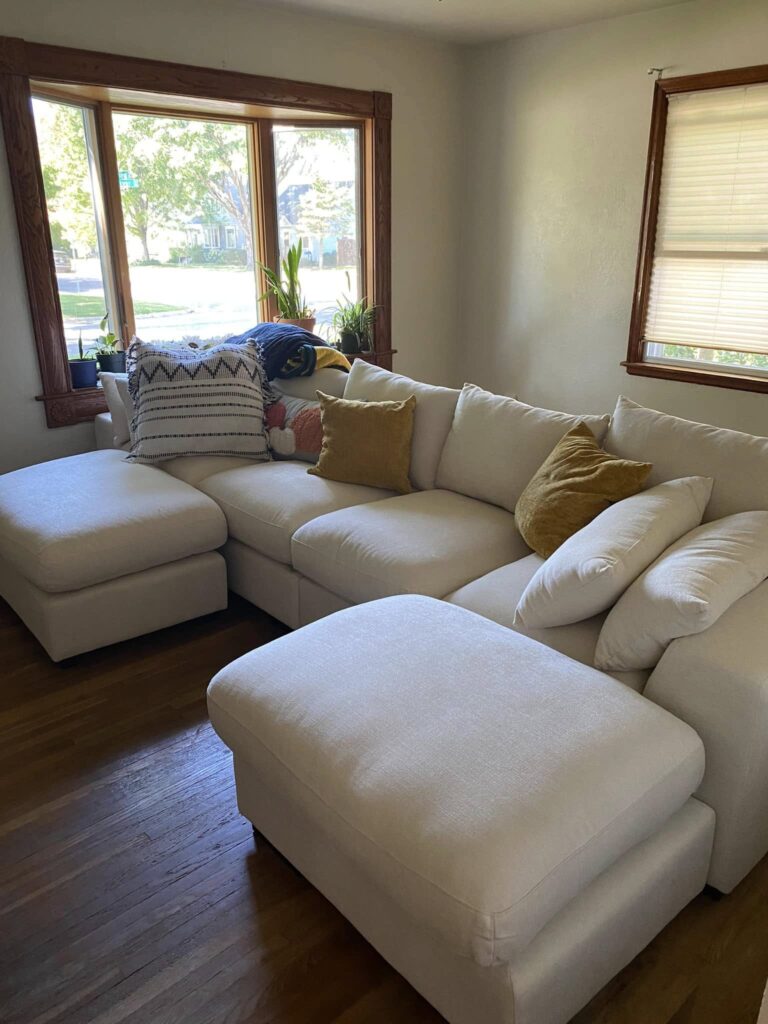
- Paint! Painting can be time consuming, BUT, it is so cost effective and done right, it will look absolutely amazing. You do not have to hire a professional painter to paint your rooms, if you are up to doing it on your own and saving a fair amount of money in the meantime. Below are a few before and afters of the living room and guest bedroom I just finished painting. Below is a list of supplies I have been using and recommend, prices of the items purchased, and total cost of project at the bottom of this post. I personally like Sherwin Williams “How to Prep Walls for Painting” for preparing the rooms. Feel free to lightly sand the walls as well before painting. I used a 120 grit sandpaper — see links below for help.
Sherwin Williams “How to Prep Walls for Painting: https://www.sherwin-williams.com/en-us/project-center/paint/how-to-prep-walls
Supplies I recommend for painting your rooms and future paint projects:
1. Painter’s Tape: I really liked the FrogTape (multipurpose) It adhered well and was nice and thick for my edges. I felt as though it did not let any paint seep in. There is also different kinds of FrogTape (delicate surfaces, rough, etc). Choose your paint tape wisely. This is really the most time consuming part of the project, but the feeling of pulling that tape off and seeing it a clean edge is unbeatable.
2. Drop cloths or Old Towels. A money saving tip: I used old, worn out ragged curtains as drop cloths that I already had on hand and planned to throw.
3. Painter’s Tray. I picked up about 3 or 4 of these from Menards, my go to store currently with their rebates on purchases. Instead of picking up painting trays and liners, I just chose cheap trays, but whatever is most cost effective for you is fine!
4. Paint brush – I bought several for these, knowing I would be doing multiple rooms, for trim and cutting in. At least at Menards, for the beginners like me, the brushes are labeled very nicely in the paint section regarding what they should be used for and fairly priced. I chose accordingly but also borrowed plenty too from friends and relatives. If you have this option and support, go for it. This ultimately saved me the most money on my painting projects but the rebates really do help too.
5. Paint rollers and paint roller frames. Choose the rollers and frames you think will be best for your space. In my living room, we have rough, textured walls. But, in the bedrooms, the walls are smooth, so I bought rollers accordingly. I also bought roller frames that can be extended for hard to reach places and separate ceiling rollers for painting the ceilings.
6. Paint Stir Sticks. These are usually given to your for free. I think Menards has given me four or five stir sticks with each gallon of paint I have purchased from them.
7. Ladder, Step Stool, or Chair. Money saver tip: If you are a little unsteady on your feet, please use the safest equipment available. I did eventually borrow a ladder from a family friend but a stable chair did the trick for me for a few rooms.
8. Wall Spackling. I have really, really liked working with DAP DryDex Color Changing Spackling so far. Again, you can get this at really any home improvement store. I just like most of Menards current prices with the rebates.
9. Drywall putty knife. You will need some sort of flat knife to apply spackle to wall holes, cracks, and indents on your walls before sanding and painting. I use this one and have a few on hand of different sizes: https://www.menards.com/main/tools/hand-tools/drywall-tools/warner-reg-4-flex-carbon-steel-drywall-putty-knife/184/p-1444446014336-c-8951.htm
10. Sandpaper. I bought 120 Grit, 180 Grit, and 60 Grit for the various surfaces I am painting, but I have found the 120 Grit just provides a nice light sanding on the walls I have liked so far. You can get these for about $5 per pack and cut into a few squares to use along your walls.
11. PAINT! I have been using Pittsburgh Paramount Paint from Menards. I really like this paint. It will cost you a little bit more, but I have been paying about $60 per gallon of paint and am finding that it goes on beautifully, does not look cheap, and usually covers in one to two coats. Behr brand of paint also has great reviews. Because I am spending the most on the paint, I am doing two coats typically to ensure beautiful coverage. The prep work is done. You want the final product to be really nice. I have been really impressed with this paint so far. Feel free to use any brand that you want. I just recommend purchasing high quality paint.
12. Extras you may want: masks, safety glasses, basic tool kit, grocery or garbage bags to keep your brushes and rollers from drying out, dish soap to wash your brushes and rollers at the end of each painting day, trim brushes if planning to do the trim, trim paint if planning to do the trim, new curtains, new window screens, and fan(s) for ventilation.
One response
Hi, this is a comment.
To get started with moderating, editing, and deleting comments, please visit the Comments screen in the dashboard.
Commenter avatars come from Gravatar.